|
|
|
|
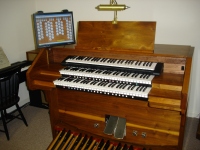
Organ Building PageA Project To Convert a Schober Analog Organ to MIDI
This page descibes modification of my old Schober organ console to output MIDI signals. The purpose is to use it with the Hauptwerk organ simulator program.
The Schober Recital Organ was built as a kit in the early 1970's and used analog frequency divider tone generators. Much better sound is available today using modern digital computer technques.
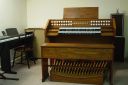
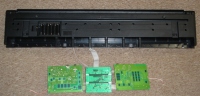
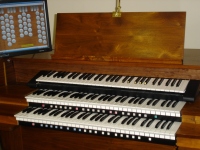
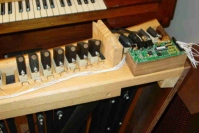
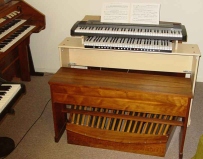
Essentially, the only thing saved from the original Schober design was the cabinetry, which is very sturdy and has a nice furniture walnut finish. The pedal board was converted first so that it could be used with external MIDI keyboards. All the electronics from the console was ripped out and discarded. Unfortunately, I also had to discard the original keyboards because they could not easily be used to output On-Off switch functions. The same was true of the stop tablet assembly. Drawknobs were substituted for the stop controls because they are more conventional of true pipe organs, and could be made easily. The keyboards were purchased from Classic Organ Works in Canada www.organworks.com. These are 61-key units with built-in preset buttons. The two keyboards are fully programmable and work perfectly.
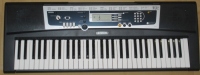
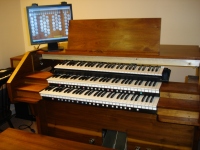
After languishing with only two manuals for several years, I have finally added a third one to my Hauptwerk setup at very low cost. I started with the least expensive Yamaha 61-note keyboard, then dismembered it and removed the unwanted casework, controls and speakers. For years I was discouraged from adding three manuals since the Schober console was built for only two. Moreover, it soon became apparent that the original design with mechanical drawknobs was awkward for use with the various organ sample sets that I use. With the original 34 drawknobs it was impossible to properly label them for use with different organs. Also, many organs have more than 34 stops.
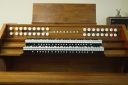
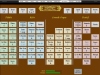
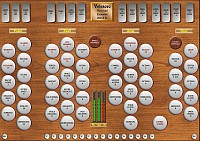
The answer is touchscreen control with all stops and couplers custom displayed for each virtual instrument. This made the
mechanical drawknob panel superfluous. The drawknob panel could then be removed to make room for the third manual.
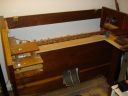
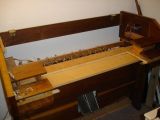
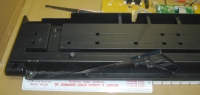
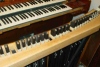
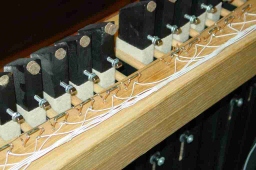
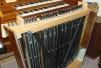
A pedal board from an old analog electronic organ (Schober Recital Organ) was converted to output MIDI signals. Similar units from old pipe organs are sometimes available surplus.
The switches are mounted on copper "nails" which are tapped into predrilled holes in the wood frame. The "nails" are actually just short pieces of #14 bus wire as used in electrical house wiring. Magnets are mounted on steel hex-head screws which are partially screwed into the wooden pedal boards. No glue is used, the magnets just stick by themselves. The advantages of this arrangement are that the switches are soldered to the copper "nails", and adjustment is made by simply bending the nails back and forth, and/or turning the magnet screws in and out.
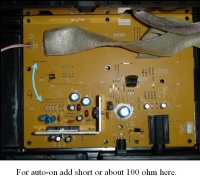
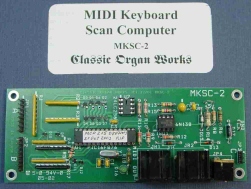
The keyboard encoder was purchased from Classic Organ Works in Canada www.organworks.com. This a 61-key unit, and the excess above the 32 pedal notes was eventually used to sense other organ control positions. This encoder seemed to be the best buy because it includes a built-in MIDI-merge function. The encoder works perfectly.
|